1. Find the tool
2. Start a new project
3. Create: Set library depth, choose variable biomodules
4a. Design- Choose secondary biomodule
4b. Swap biomodules
5. CheckUp- Validate for manufacture
6. Report - View results of the analysis
7. Add-On- Additional Services
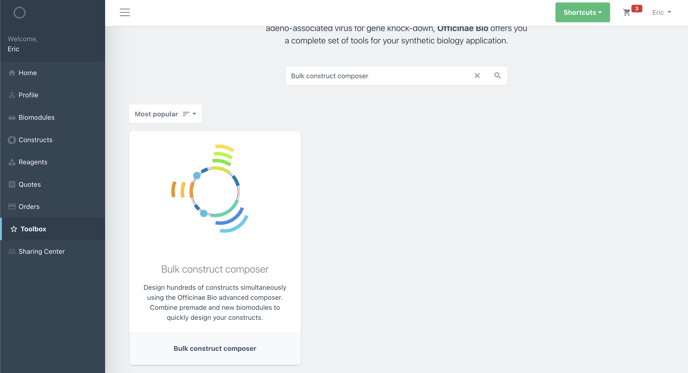
Step 1: Find the Composer Tool
You can find the composer tool in the Toolbox. Search "composer" in the search bar to find it.
Step 2 - Create Project and Choose a Protocol (template)
The next step is to create the project for your library. Here you can add a name and a description for your library. Next, choose the protocol for your library.

A key to the protocols
|
|
Simple Cloning A basic construct intended for cloning operations or when the construct contains one primary variable unit. This template contains placeholders for a single insert and backbone. |
 |
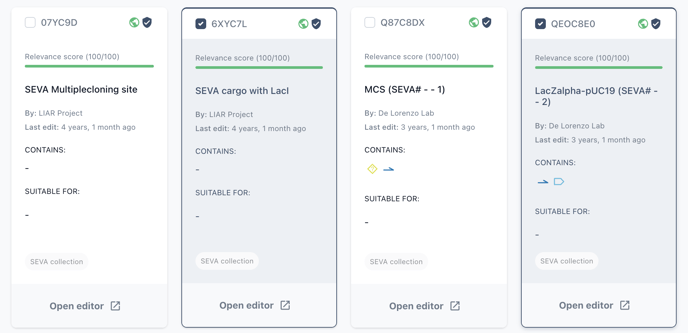
pSEVA This is a template in compliance with the Standard European Vector Architecture initiative, in accordance with the rules for the physical assembly of the three basic components of plasmid vectors - origin of replication, selection marker and the business cargo. |
 |
TAR template for yeast A construct designed to assemble linear double stranded DNA to perform Transformation Associated Recombination in Yeast. The template contains fixed placeholders for downstream and upstream integration pads, in addition to a promoter and terminator and a variable placeholder for your gene of interest. |
 |
AAV A construct template designed to standardise and streamline adeno-associated vector design. The template contains an exchangeable placeholder for a Gene of Interest plus seven fixed placholders for regulatory elements, inverted terminal repeats and a backbone. |
 |
t-DNA A construct template designed to simplify transfer-DNA vector design. The construct contains seven empty placeholders for five transcriptional units, a stabilising element and a Ti Backbone. |
|
|
Template for Genome editing Designed as a shuttle for a payload to be used for genome editing. In this template, the "payload placeholder" is flanked by an upstream and downstream "homology arm placeholders" designed for homology directed repair (HDR) but it can be used also with other genome editing techniques such as transposons (e.g. PiggyBac) by placing ITR in the "homology arm placeholders". |
|
|
Linear DNA template for mRNA IVT A linear DNA template containing placeholders for biomodules for in vitro transcription of mRNA with CleanCap and precise length polyA tails. |


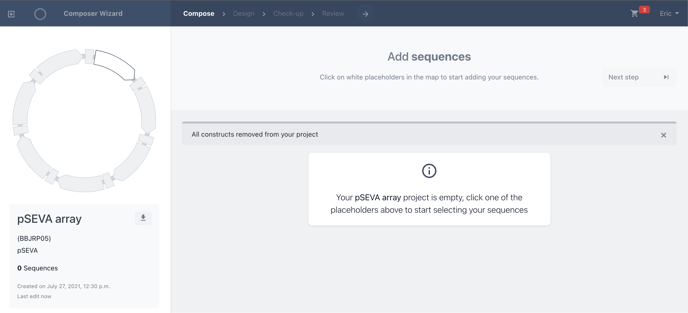
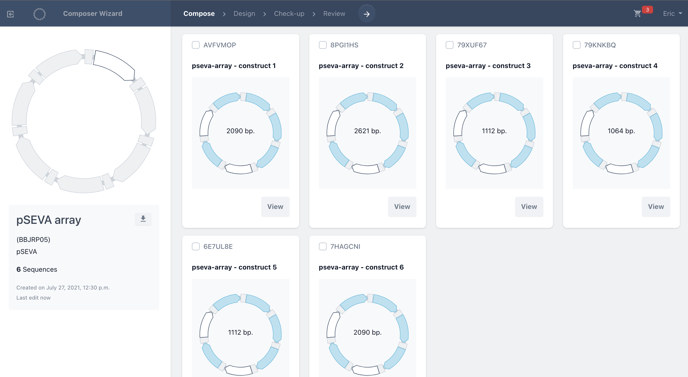
Step 3 - Create: Fill Primary Placeholder and set library depth

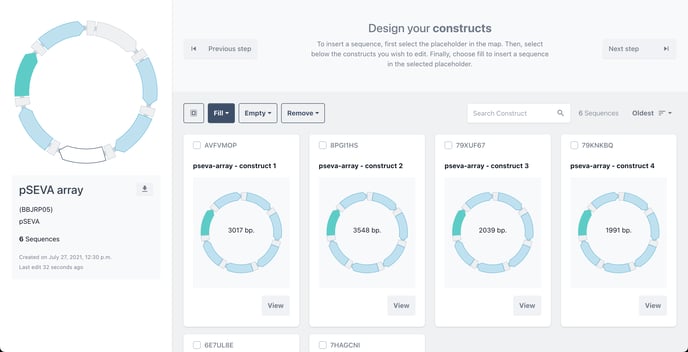
With your chosen protocol, you can now begin designing your library. The first step is to Create the variants of our library by filling the first placeholder. This is for the main variable biomodule of our design.
In this case for the pSEVA protocol, we will set the depth of our library by choosing our cargo.
Ensure you are at the configure (add sequences) step of the wizard.
Click the empty white placeholder on the plasmid map of the left, to fill this position with biomodules.
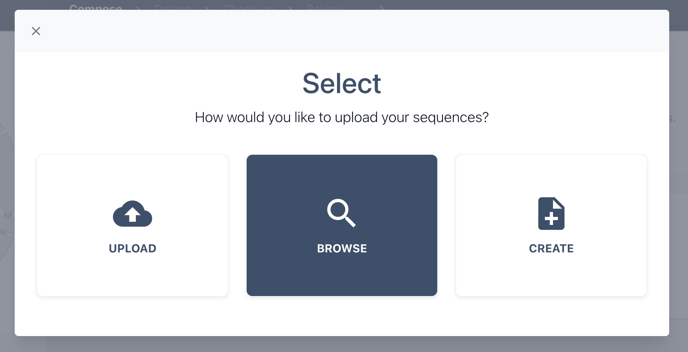
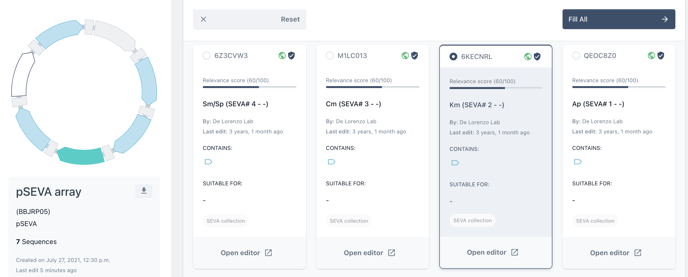
You can now choose to upload a genbank file containing multiple sequences for your biomodule, select multiple biomodules from your collection or create a new biomodule from file.
When selecting sequences from your collection, check each biomodule you would like to add to the library and choose add.
Once added, you will see a library of constructs begin to form, with a construct for each biomodule selected.
Step 4 - Design - Fill Secondary Placeholders

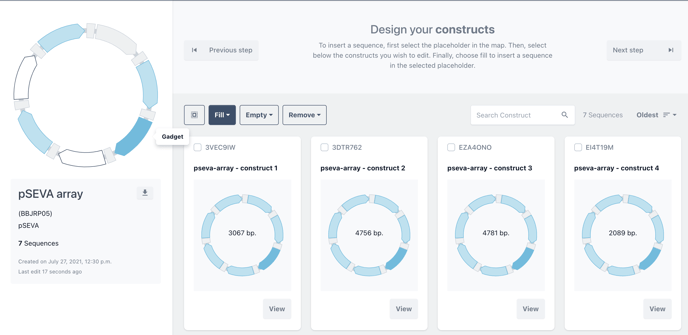
Choose Design to begin selecting secondary placeholders. Now, we can add a single biomodule to the remaining empty placeholders in a single click or create combinations of variants by adding a single biomodule to an individual construct.
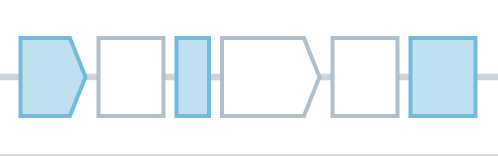
The remaining empty placeholders are marked in white in the master template and on each of the constructs in your library
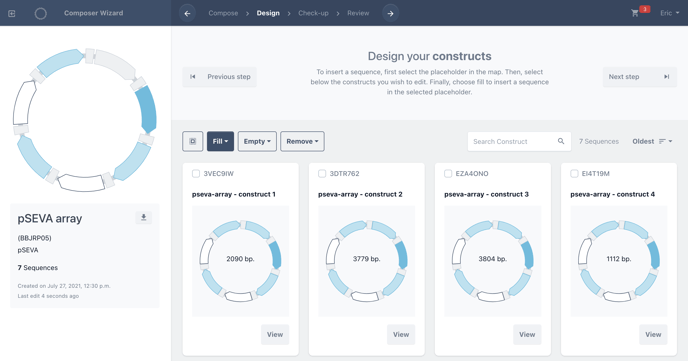
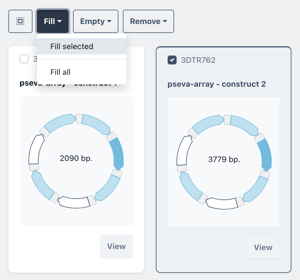
Clicking on the empty placeholder will allow you to fill that position in the design. The placeholder will turn from white to green to illustrate your selection.
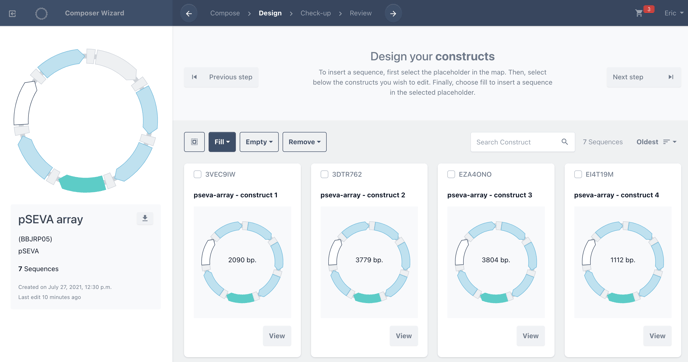
Click fill, then fill all to fill all placeholders with a single biomodule.
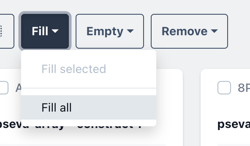
Or select a single construct and choose to fill selected with a single biomodule in the selected construct.
Next, from the biomodule selection screen, check your chosen biomodule and choose to fill all or fill selected.
The placeholders of each filled construct will now change from green to blue in your library to illustrate that has been filled.
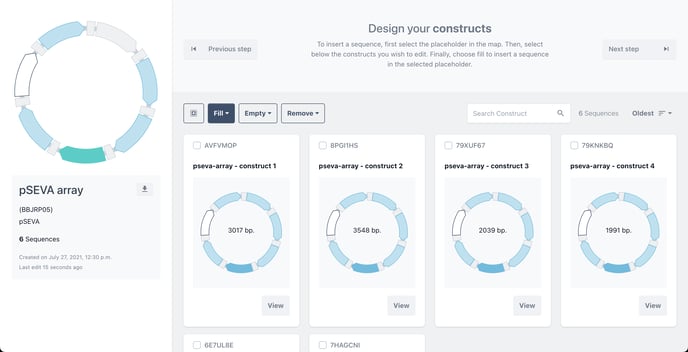
Choose the remaining empty placeholders to complete your library.
Optional - Swap standard placeholders
Most protocols contain pre-filled placeholders containing standard biomodules for each design. These will be marked in light blue and can be changed as any other placeholder in your design.
Click on a blue placeholder, to choose that position in your design. The placeholder will turn from light blue to dark blue to illustrate that you are editing this placeholder.
You can fill all or fill selected as in the previous steps.
Unlike standard biomodules marked in light blue, mandatory biomodules will be marked in grey. These biomodules are obligate parts of a design system and thus are not editable.
Step 5 - Validate designs

Choose CheckUp, to validate the designs for manufacture.
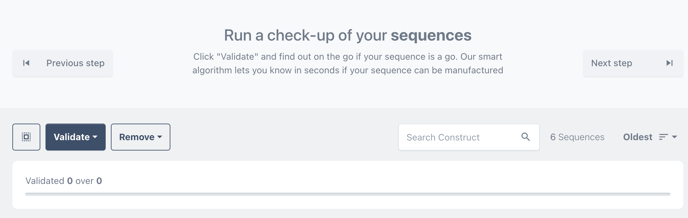
choose validate all run a check up of all your sequences all at once.

You may need to wait a few minutes for the checkup to complete.

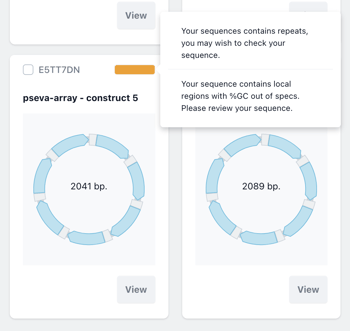
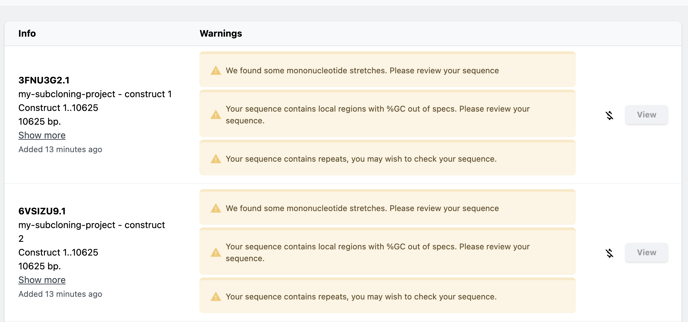
The results of the sequence checkup are visible on the card of each construct.
Choose view to enter into the sequence editor and review the warning annotations where relevant.
The Key to Colour warnings:
Green - Everything is fine. Good for manufacture
Orange - Minor manufacture issues. Hover to view more information.
Red - Major manufacture issues. Please review before synthesis.
Step 6 - View Report

Choose Report to view a summary of the issues found during analysis.
Any issues found will be reported next to the construct name. Click the view button next to any construct to view that issue in the sequence viewer. From there you can make edits as per our advanced sequence editing tools. Learn more about those tools here.
Final Step - Add-Ons and Add to Cart
Finally choose Add On to move to the final step and begin adding additional services.

By selecting individual or groups of jobs you can add additional services such as volume amplification, purification, form and delivery and more. First select the check box next to the item you wish to add services to.
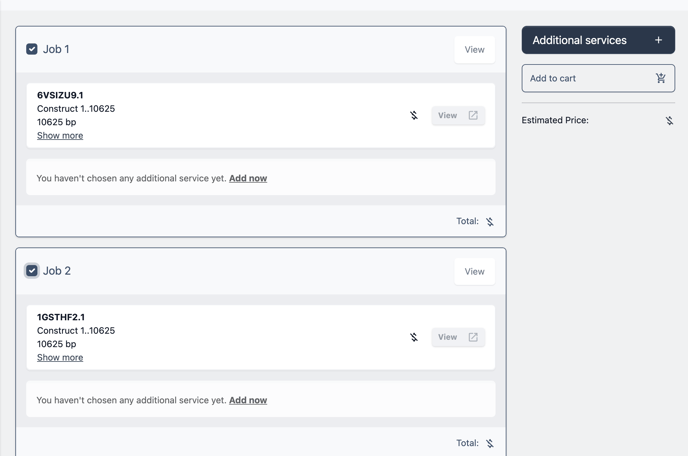
Next click the button additional services and choose to add services to the selected items or all items at once.

Now select the services you wish to add.
You can now see these services added to the selected jobs.
Once you have finished selecting the desired, choose add to cart and proceed with your order.